
How To - Bulk Assign
The below steps document how to bulk assign sites by either outlet name or reference. This functionality could be utilised for Delivery Schedules, Master Templates, Outlet Budgets, Allocations and Departments.
-
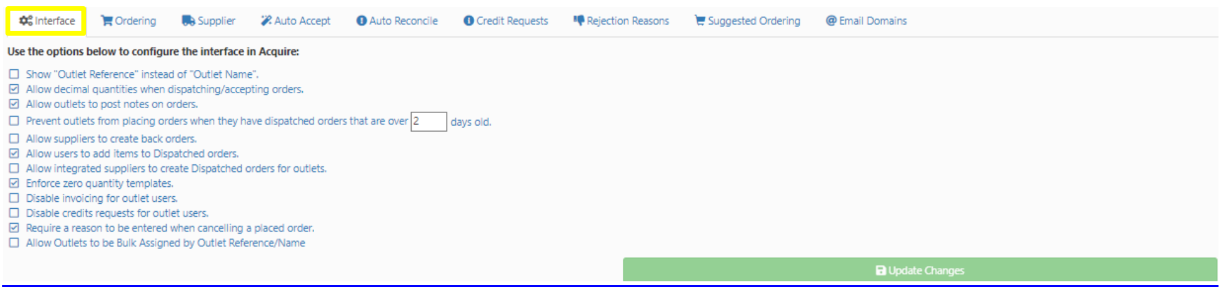
From within the Admin Functions select Company Settings followed by Interface.
-
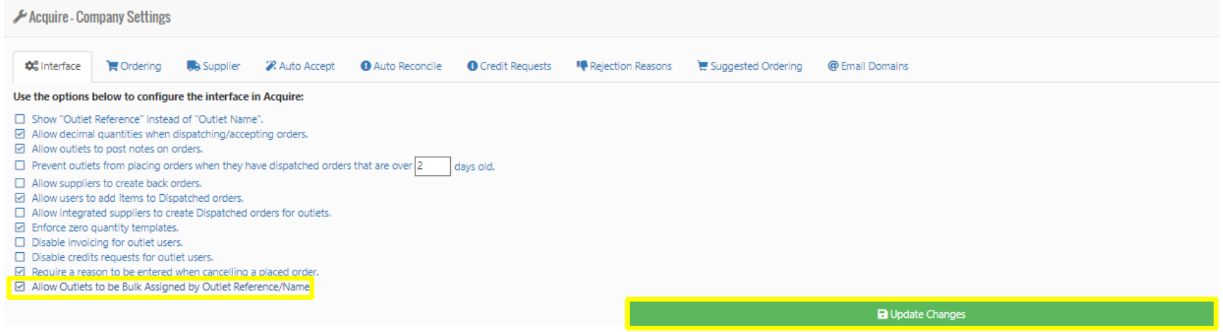
To enable the Bulk Assign functionality, tick the Allow Outlets to be Bulk Assigned by Outlet Reference/Name option, then select Update Changes.
-
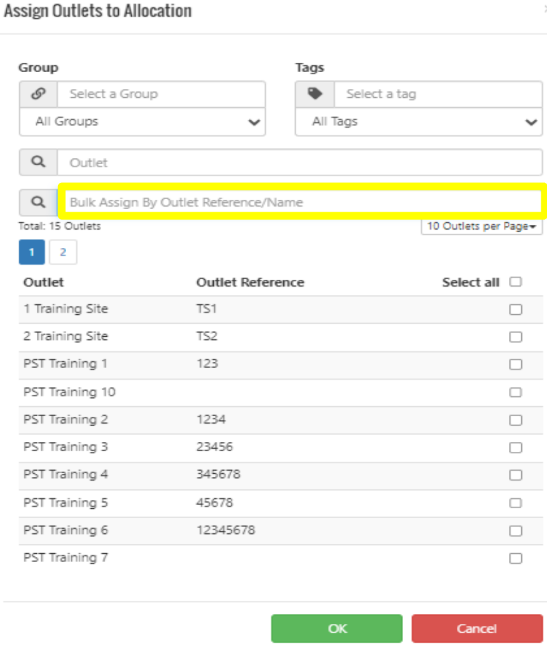
Once you have created the task and need to assign to venue, within the Bulk Assign window input the outlet name or reference number followed by a comma until all outlets required have been entered.
-
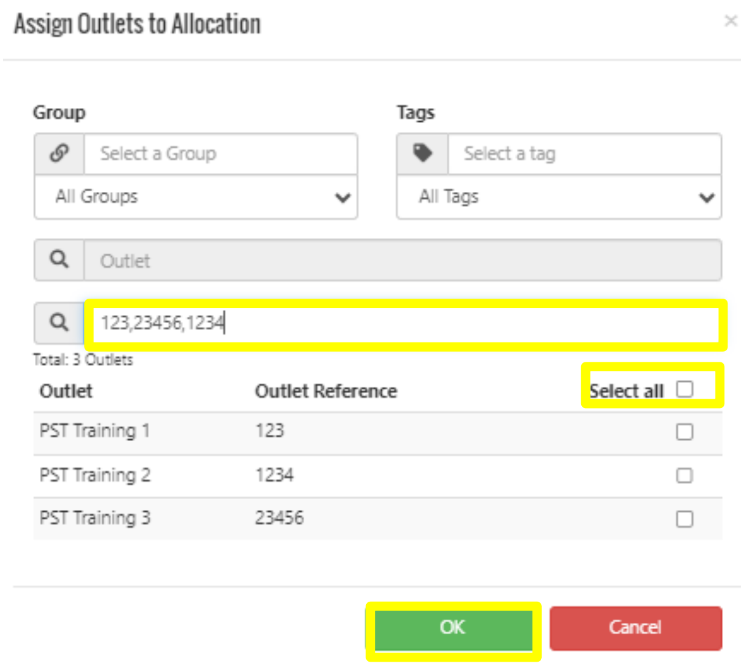
This will now filter through your estate and display each of the required outlets.
-
Now click "Select all" and then OK.
-
In the top date field, you will need to enter the date that you want the exception to apply to, i.e, a change to the standard delivery schedule. This is the only information you need to fill out on this date field.
-
On the bottom date field, you will need to enter the new delivery date that has been allocated.
-
You will then need to tick the Delivers tick box; this will allow you add an additional day outside of your normal schedule.
-
Enter how many Days In Advance this order needs to be placed by to ensure delivery on this exception date.
-
Enter the Cut-off Time.
-
Select the green Assign Schedules button, which will open your Assign Delivery Schedules to an Exceptionpage.
-
Select the Delivery Schedule that you would like this exception to apply to by ticking the box on the right-hand side and press OK
-
Select Create Exception.
If your Supplier will only allow 1 order to be placed per site prior to cut off time, you will also need to select Limit Ordering. If the Supplier will allow multiple orders prior to cut off time, you will not need to select this
![]()
![]()